
In the digital era, social media platforms serve as the primary means for staying connected with friends, family, and the world at large. Among these platforms, Facebook has emerged as a ubiquitous tool for social interaction. If you’re contemplating a change in your identity presentation on Facebook, such as altering your name, you might be uncertain about how to proceed. Fear not! We’ve compiled an easy-to-follow guide to help you seamlessly navigate the process. Follow these simple steps to modify your name on Facebook effortlessly.
Also Read: How to Deactivate Facebook Account
Step 1: Log into Your Account
First and foremost, ensure you are logged into your Facebook account. Navigate to the top right corner and click on the downward-facing arrow to access the account settings.
Step 2: Go to Settings
Select the “Settings” option from the drop-down menu. This will lead you to a page where you can manage all your account settings and make the necessary alterations.
Step 3: Click on ‘Edit’ Next to Your Name
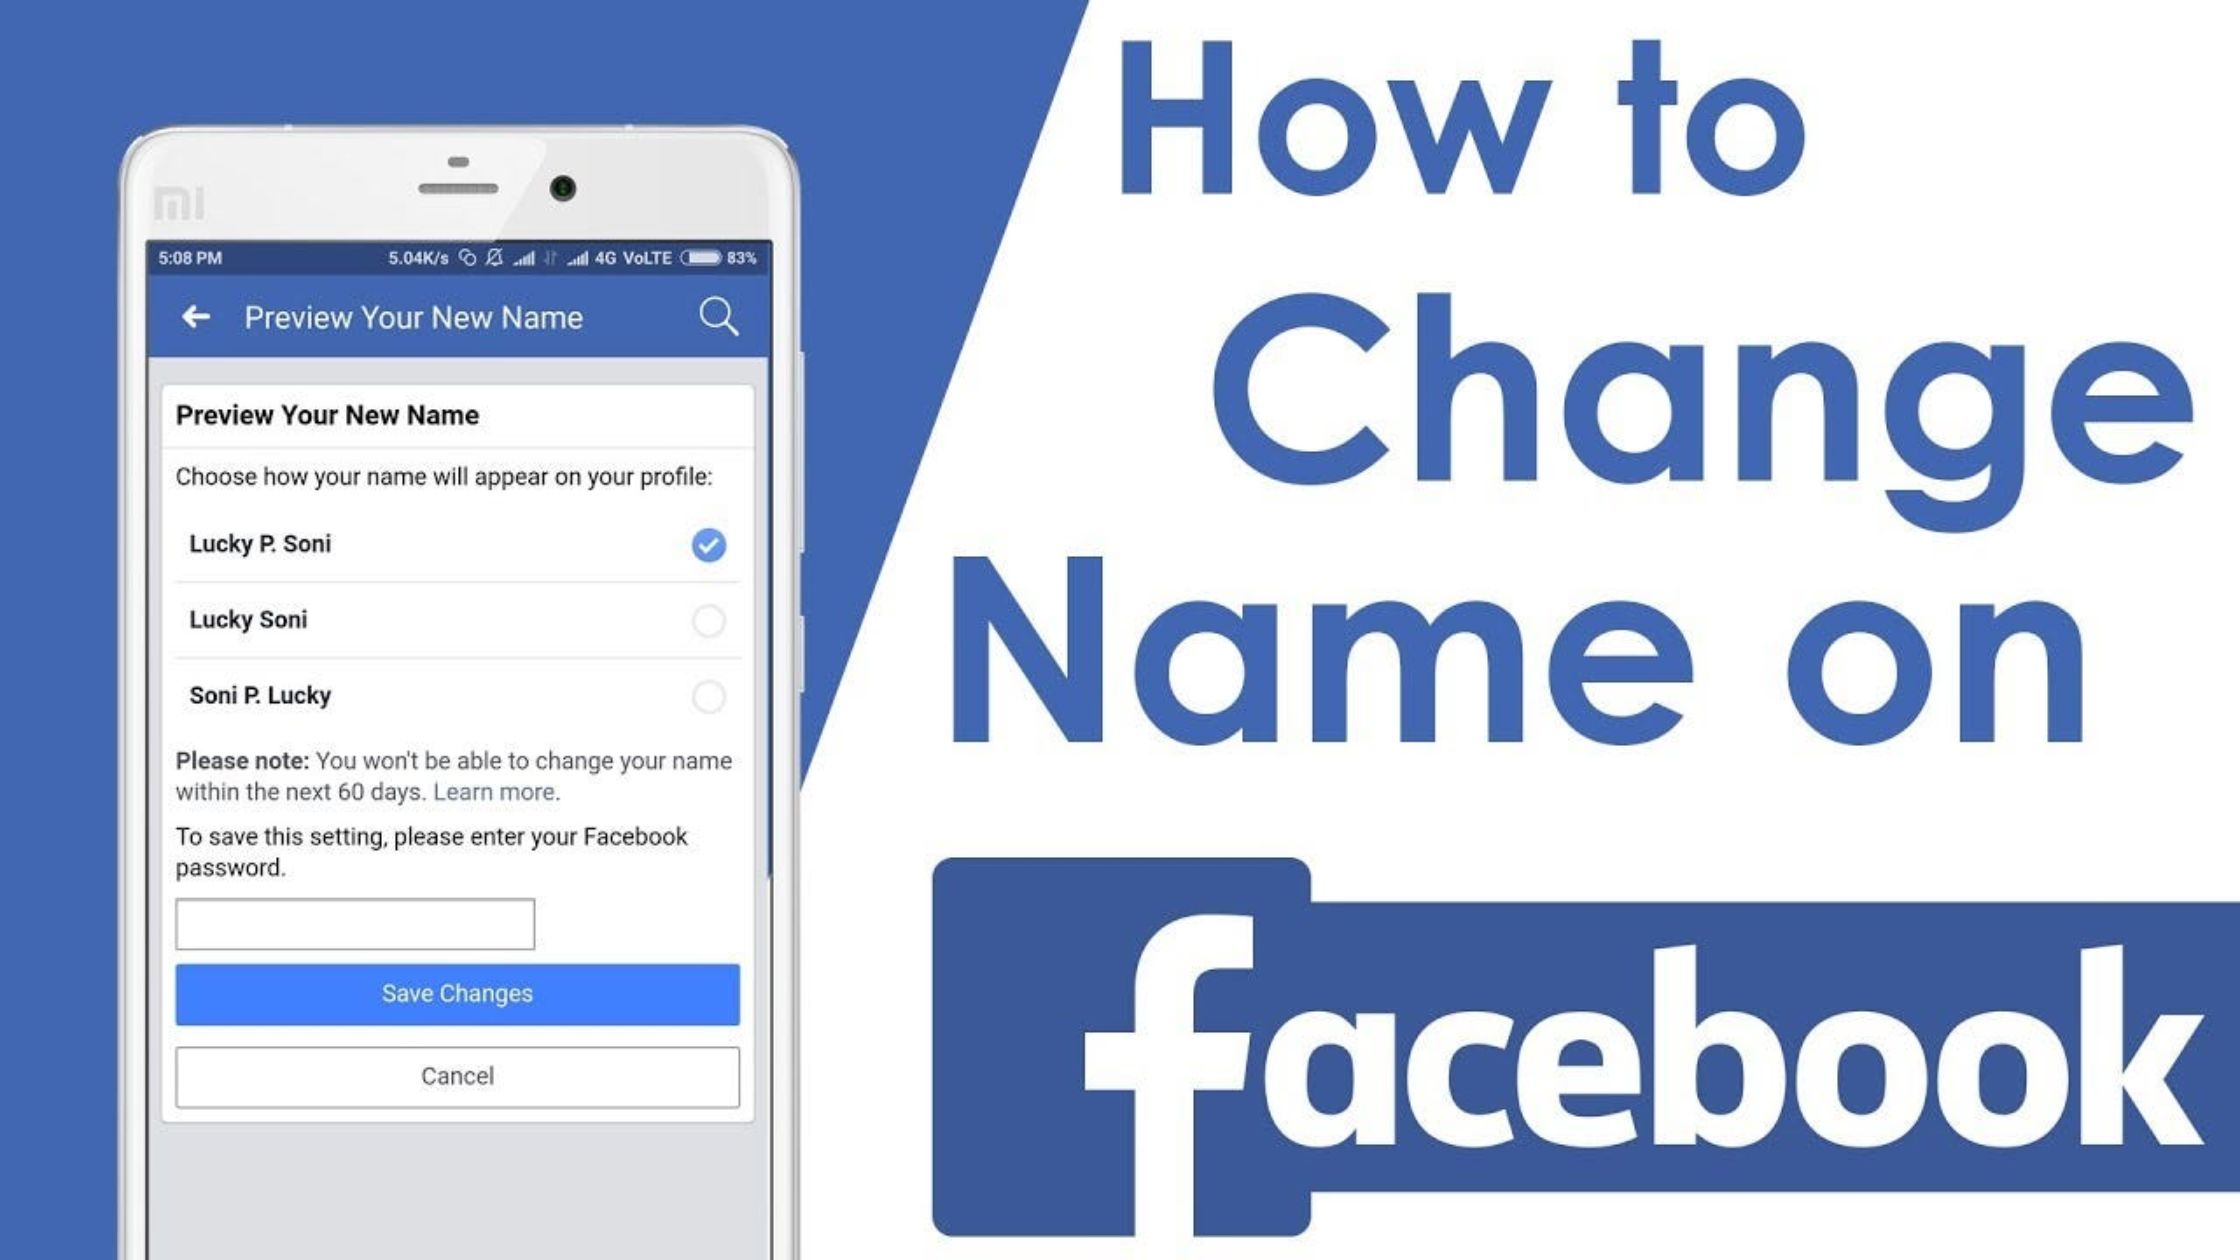
Once in the settings, locate the “Name” tab, and click on the ‘Edit’ option next to your current name. This action will prompt Facebook to request your password for security purposes.
Also Read: Facebook Ads: Maximizing Reach and Impact
Step 4: Modify Your Name
Enter your new desired name in the provided fields. Make sure the name adheres to Facebook’s policies and guidelines to prevent any issues with the change request.
Step 5: Review and Save Changes
After entering your new name, take a moment to review it thoroughly. Confirm that it accurately reflects your identity and is free from any errors. Once you’re satisfied, click the ‘Review Change’ button.
Step 6: Submit a Request
Facebook may require you to provide a form of identification to verify your identity and ensure the authenticity of the name change request. Follow the platform’s instructions to submit the necessary documents promptly.
Step 7: Await Confirmation
After submitting the required documents, sit back and relax while Facebook processes your request. You will receive a notification once the change has been approved. This process typically takes a few days, so exercise patience during this period.
Remember, Facebook maintains specific guidelines concerning name changes to preserve the authenticity and security of user accounts. It’s vital to adhere to these guidelines to avoid any issues during the modification process.
Also Read: A Comprehensive Guide to Facebook Campaign
In conclusion, modifying your name on Facebook is a straightforward process, provided you follow the platform’s guidelines meticulously. By following these simple steps, you can ensure that your updated identity is accurately represented on the platform, enabling you to continue your social interactions seamlessly.
Stay connected with your digital community while staying true to your evolving identity!